Thursday, December 31, 2009

Advanced Contouring


Reference: Kevyn Aucoin


    Makeup: Jessica deBen   Photo: Marc Goldstein

Here is a makeup look I did using Kevyn Aucoin's style of contouring. Alison Raffaele's #3 True concealer (www.alisonraffaele.com) was applied under the model's eyes and Alison Raffaele's #2 True concealer was used on the center of the forehead, bridge of the nose, and around the lips.

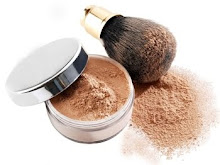
All the other contouring was done using La Bella Donna's Mahogany and Topaz compressed minerals (www.labelladonna.com). These are bronzing minerals that are dark enough to match Iman's or Beyonce's skintone. They have no mica, glitter, or reflective ingredients of any kind. They are perfectly matte.


La Bella Donna's topaz bronzer is on the far right. (www.labelladonna.com)

 This look would be difficult to create without the right shape of brush. Hakuhodo's flat highlighting brush ($21) is the best brush I've found to contour the sides of the nose and cheekbones. It is incredibly soft and pulls the powder onto the skin smoothly and evenly. I picked this one up at The Makeup Show (www.themakeupshow.com) which is hosted by The Powder Group (www.thepowdergroup.com).

Hakuhodo's flat highlighting brush (www.hakuhodo.com)


Wednesday, December 30, 2009

Simple Contouring for a picture perfect New Years


Before contouring                                                       After contouring

Holidays mean photos with family and friends. New Years’ Eve is no different, and with the makeup magic of contouring the only thing you’ll think when you see your photo is, ‘I really am photogenic.’

And you’ll have basic contouring to thank for your sculpted cheekbones and sleek jawline.

Here’s what you’ll need:

• La Bella Donna’s pressed mineral foundation in Umbria (or your skintone)
• La Bella Donna’s pressed bronzer in Amber (a darker, matte shade)
• Mineral powder brush or sponge to apply foundation powder
• Contour/Blush brush to apply bronzer


To start, apply the pressed Umbria foundation powder with the sponge. If you have a lot of redness, cover it; but avoid putting pressed foundation on the cheeks.  As you can see in the photos, I covered the redness on her chin, nose, and jawline. I even covered the redness on her ears. I do not cover the cheeks. I leave that area free of makeup. This keeps the cheeks looking naturally ‘flushed’. I find that covering redness with foundation powder just makes the skin look obviously made up and if too much foundation powder is applied, the skin can look ‘ashy’. If you have rosacea, try leaving your cheeks free of makeup.
To contour, find the cheekbones and brush the Amber powder right underneath them. If you’re not sure what angle to follow when applying the Amber, make an imaginary line from the bottom of the nose to the top of the ear. Use that line as your guide. Usually the line of the cheekbones is parallel to the line of the jawbone. Contour the jawbone and make sure to darken any saggy skin. Darken the triangular area that connects the chin and neck. Check your makeup in at least 2 different mirrors to make sure the contouring is blended in. Then, get ready to smile for the cameras.


Sunday, December 27, 2009

Best Products to Make Skin Look Muddy


Creating makeup for feature films can get ugly. Especially when you've got an action-packed battle scene.  

What’s the key to make an actor look like they’ve been fighting on the dirty, swampy Chalmette Battlefield in the War of 1812?


MUD.

To create the look of muddy skin, I’m testing the following products:
  • Gerda Spillmann Bio Fond cream foundation in Sable
  • Maybelline Mineral Power Bronzing Liquid Veil gel
  • Ben Nye Bronzing Body Tint liquid
  • Loreal Ideal Balance liquid foundation in Mocha
  • Makeup For Ever Mat Velvet liquid foundation 
  • Merle Norman Remarkable loose powder in Deep
  • Cover Girl loose powder in translucent tawny
  • Hershey’s unsweetened chocolate powder


And the winner is…

Gerda Spilmann. The Bio Fond Sable foundation has enough of a green undertone to make it look believable. The cream formula does a good job of resisting sweat and humidity.

Maybeline’s gel and Ben Nye’s Bronzing Tint were too sheer to use for this effect. They stain the skin like ink and never looked natural. The stain lasted for hours so I wouldn’t use either of these products on set. Ever.

Loreal’s and Makeup For Ever’s liquids are amazing as foundations but not right for this effect.

Merle Norman’s loose powder and the Hershey’s chocolate powder worked well. I may dust these over the Gerda Spilman.

Cover Girl’s Professional loose powder in 125/Translucent Tawny looks like it has added glitter or too much mica. I definitely won’t be able to use this powder to dirty up skin. If you’re buying this loose powder to matte down skin, be careful because this one has a lot of shimmer.


Special FX Makeup Lesson: How to create wounds


     Jessica deBen creates a wound with Kleenex and latex.


Special Fx makeup is like cooking.
Judy Edelman of Bellus Beauty Academy (www.sandiegobeautyacademy.com) gave me this recipe for creating wounds with Kleenex tissue. I’m creating makeup for a battle scene in slow-motion, High Def, CGI next week. I’ve got to make quite a few actors bloody and dirty. Judy’s method relies on cheap supplies (Kleenex tissue and clear latex).  What are the Makeup Department’s odds for coming in under budget on this project?  Very good indeed.
Ingredients/Tools of the Trade:
  •  Latex (clear or flesh tone)
  • Thin 2-ply tissue split into 2 thinner sheets and shredded
  • FX blood (thin and very bright red liquid blood)
  • Blood gel (thicker and darker red for a dried blood effect)
  • Oil-based cream foundation
  • Hairdryer
  • Scissors or serrated knife
  • Tweezers 

Make sure your actor is not allergic to latex or FD&C dyes.
To start, layer the clear latex and shredded tissue. I used Ben Nye’s clear latex and Target’s tissues.  Do at least four layers and dry them with a hairdryer each time. Then cover everything with an oil-based cream foundation. I used Gerda Spillman’s Bio Fond foundation palette. Creating the slit for the blood can get a little tricky. I used a serrated knife (not pictured) and gently sawed my way through the first layer.  Communicate with your actor so you don’t cut too deep. Use the scissors to cut through the remaining latex-tissue layers. Use the tweezer to open up the wound so you have a place to add the bloods. For the final step, add FX blood to the deepest part of the slit and use the blood gel on the outer skin.


Sunday, December 20, 2009

2009 Beauty Tips : BEST and WORST List


BEST BEAUTY TIPS:


1. For a perfectly pink tongue and lips, suck on a red Jolly Rancher candy and drink Fruit Punch Gatorade.

2. Use an eye cream. The best eye cream I've seen this year is Clarity RX's C-Results eye cream. It works and won't break the bank. (For more info on Clarity RX, click here)

3. For smooth under eyes, apply eye cream and then put a sheet of saran wrap over the area. Leave on for 10-15 minutes.The saran wrap will trap your body heat and help the eye cream penetrate deeper into the skin for better results.


4. Use a Clarisonic brush for cleansing skin. It really does remove more dirt and makeup than you do!

5. Use a NuFace microcurrent device to lift and tone instead of getting injections or surgery.

6. Curl your lashes. Many woman are intimidated by eyelash curlers and believe they'll cut their lashes, pull lashes out or pinch skin. But if you can use a nail clipper without cutting your fingers or toes, you can easily use an eyelash curler.

7. Find out what's in your makeup. Silicones, talc, and FD&C dyes, parabens (preservatives) can irritate skin can cause breakouts and sagging. Search for your makeup on www.cosmeticsdatabase.com to see if its toxic.

8. Use a foundation brush. Putting on cream concealer or liquid makeup without a foundation brush is like putting icing on a cake with your bare hands. To get a smooth, even layer of makeup, you need a good foundation brush.

9. Wash your makeup brushes and dry them horizontally. Use warm water and your face wash (or baby shampoo) to wash your brushes, blot with a clean towel and then lay them down to dry. Drying them on a flat surface will prevent water from getting into the delicate binding of the brush.

10. Don't do it yourself. For eyebrow shaping, airbrush makeup, and removing blackheads, please don't do it yourself.

WORST BEAUTY TIPS:

1. Use toilet seat liners as blotting paper to absorb oil.

2. Don't wash your face in the morning to preserve your natural oil.

3. Tan your face in the tanning bed or sun.

4. Use blush to contour cheek bones.

5. Use sharpie markers as eyeliner or lip color.